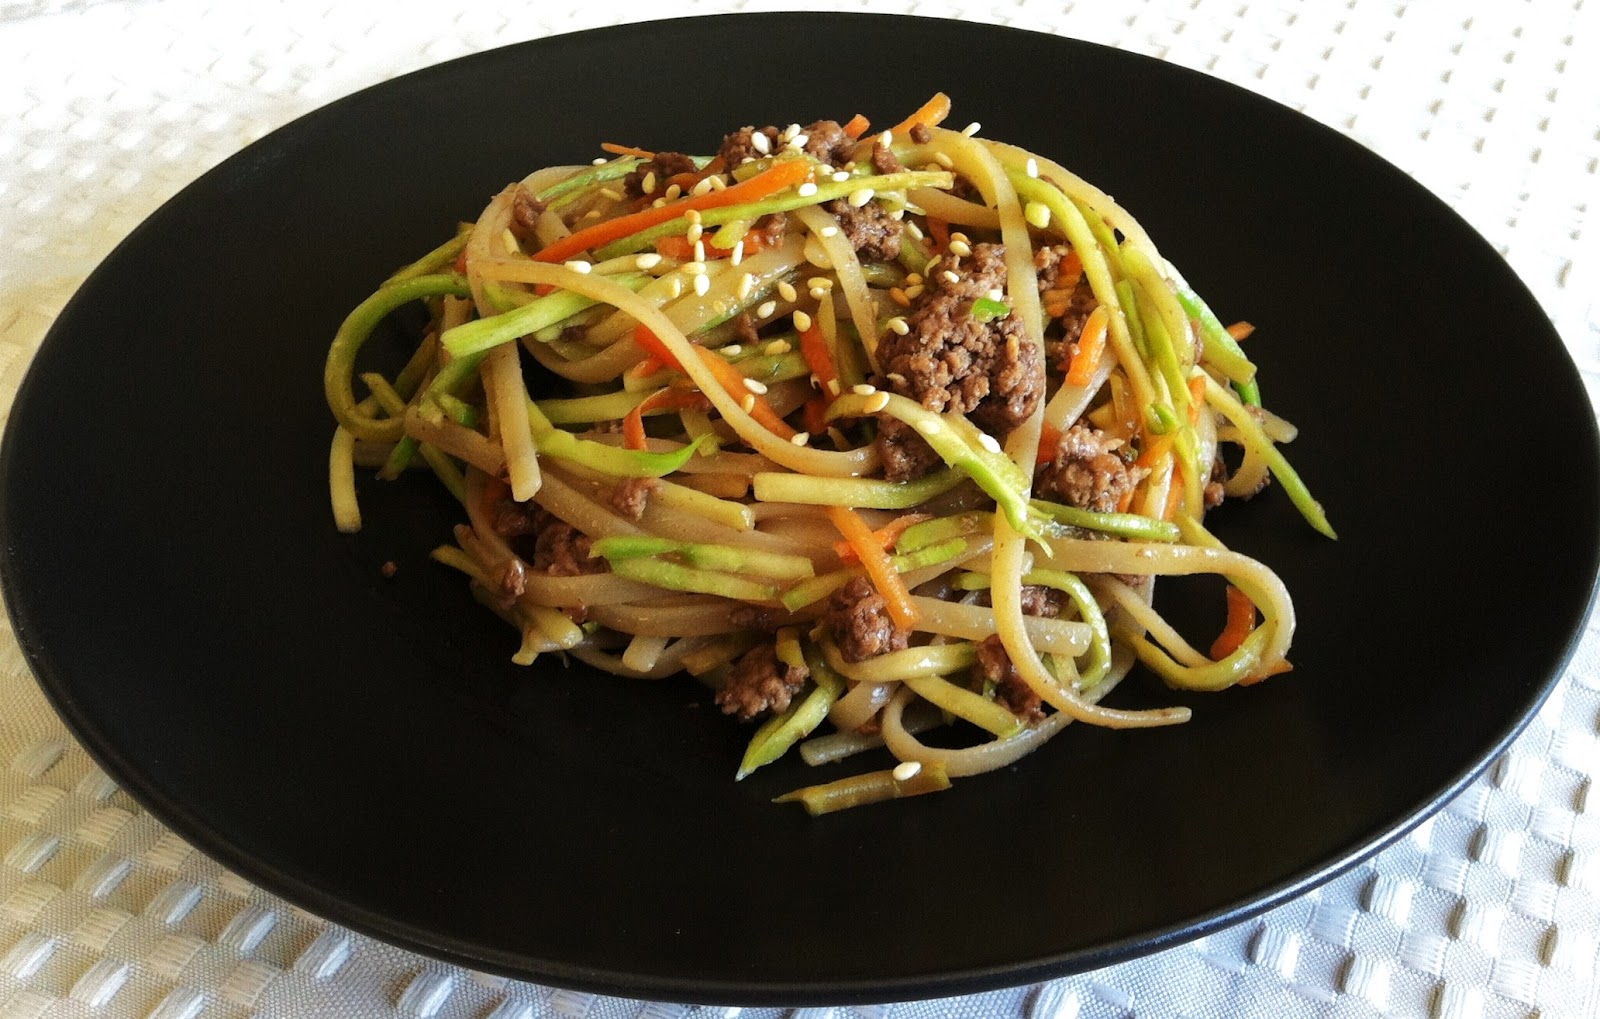
I love to cook and to share my food. When I cook dinner for friends, they often ask for the recipe, to which my response is, "oh, oops, I forgot to write it down!" So... here you go! Enjoy! ~Alison
Labels
about me
(5)
dessert
(1)
gluten free
(13)
healthier options
(5)
one pot meal
(4)
side dish
(2)
snack
(3)
vegetarian
(8)
Showing posts with label gluten free. Show all posts
Thursday, July 12, 2012
Not your average chicken soup
I have a friend from Venezuela. She is an amazing cook. She cooks the dishes that she grew up making all the time at home. What is simple everyday food to her is very exciting often complex tasting food for us here in the states. She made this great soup the other week with chicken and vegetables in it. I asked her how she made it and the "recipe" she gave me was pretty similar to how she talks about any dish she makes. It went something like, you use veggies, onions, leeks, peppers, green onions, potatoes, you cook the veggies with the chicken, then blend the veggies. Now when she does that it turns out great, I however need a little trial and error to turn her recipe into a dish.
Instead of trying to follow her vague but great recipe, I decided to make my own soup, similar to hers, but more spring like with fresh favors of the season. It did not turn out to be anything like my goal, so I will have to keep working on a recipe for the soup idea in my head but, what I did get though was a very happy accident. I got a soup filled with vegetables, that is super tasty and healthy.
The chicken and potatoes make it a hearty meal, while all the veggies make it taste fresh enough for spring and summer eating. You can really taste the peppers, but since the broth is blended, it makes eating your vegetables a easy and fun thing to do! Here is what I did.
Summer vegetable chicken soup
2 chicken breasts, skinless bone in
5 green onions whites and greens roughly chopped
1 lbs peppers, mixed colors ( I used bagged frozen because it was cheaper that week)
1 sm- med onion cut in half
3 leeks, thoroughly rinsed and chopped
1/2 -1 jalapeño seeded
3 small- med baking potatoes (whole)
2-3 ears of corn cut in half or thirds, but corn still on hull
4 cups of water
Salt and pepper
Small pinch red chili flakes
1 pinch oregano
Place the chicken and potatoes on the bottom of a large stock pot to ensure they get cooked evenly. Add all other ingredients except for corn. Add about 4 cups water, it should just completely cover all ingredients in pot. Bring to a boil, reduce to simmer. Simmer about 20-30 minutes, until chicken is cooked, and potatoes are tender. Remove chicken and potatoes from pot let cool slightly. Blend remaining ingredients until smooth with a stick blender, or move to blender and blend. When broth is smooth add it back to pot and add corn. Let simmer. When chicken and potatoes are cool enough to handle, shred chicken, and chop potatoes into about 1/2 inch cubes and add back to pot. Soup will be ready to serve immediately or kept warm on stove until serving time.
The great thing about this recipe is that it is so flexible. If you don't have leeks, or don't want to buy them, leave them out. If you have some carrots and/or celery sitting in your fridge that you need to use up, toss them in too!
This makes a lot, I know, but the leftovers are great. Later this week I will post what I did with some of the leftovers I had, personally, I think it was even better tasting than the initial soup!
oh..... and about the corn. So when I first had this dish, it was with a large group of people. None of us seemed to know what do do with the large chunks of corn, most of us scooped around them. Finally someone braved picking it out of the soup broth and eating it like corn on the cob. A little messy, yes, but oh so good! Now I get as many pieces of corn in my bowl as possible!
Tuesday, July 10, 2012
Jalapeño Popper Grilled Cheese
Paul has been out of town a couple times for work lately. I miss him when he is gone, but I often make it a special time for me. Time to watch a chick flick, to get things done at my own, slower pace, and especially, to eat something special. I eat something that either he doesn't like, or something he can't eat with his allergies. And well, he doesn't like jalapeños... Crazy, I know. I love jalapeños! More than just jalapeños I love jalapeño poppers! I like that crispy outside, with the creamy cheesy inside, and that really spicy kick. They just might encompass everything about a perfect food!
Here's my problem with jalapeño poppers. One, I don't really deep fry foods. Once every couple of years for a special occasion, but it's a lot of work, mess, and hot oil, not to mention not the most figure friendly. There are so many good foods that don't require frying, I just stick to eating to occasional fried food at a restaurant. Two ( that was a long one) you can't really make a meal out of just the poppers. I have found the solution! Jalapeño popper GRILLED CHEESE!
Jalapeño Popper grilled cheese
Quantity per sandwich
2 slices good hearty bread, your choice
1/2-1 roasted jalapeño seeds removed, chopped
About 1 oz goat cheese
Small handful grated cheddar cheese
Butter
Olive oil
Salt
Toss peppers with olive and salt and roast in 450 oven for 5-10 minutes until charred and softened. Let cool. When cool enough to handle, peel off some of the skin (you don't need to get all of it, some left on is fine.) If you want to make it easier to take off the jalapeño skin, you can put it in a ziptop bag, or in a sealed bowl while it is cooling. It does make it easier, personally, I think it created more dishes/mess than it helps out. Take out seeds and chop. Be careful of the heat from the oils on your hands, wear food grade plastic gloves, or just make sure not to touch your eyes for a while afterwards. Use 1/2 to one whole pepper per sandwich depending on the heat of the pepper, and your preference. After prepping the jalapeño, it goes together just like any other grilled cheese.
Spread the goat cheese on one side of the bread, top that with the jalapeño pieces, a handful of cheddar cheese, and you top slice of bread. You can butter the bread before putting it in the skillet, or sometimes I just butter the skillet, then put the bread down right away. It's my I'm feeling lazy version... I've also found I can use less butter that way, if I put just enough down so the bread doesn't stick to the pan.
The finished product will get you wanting to make another sandwich right away. It did for me, and a second sandwich is what I had. The goat cheese makes a really creamy rich texture to contrast the spicy charred jalapeño. The buttery toasted bread adds that crunch, and everything together really does taste like a jalapeño popper. Enjoy!
Alison
For those like me watching what and how much they eat, I'm working on calculating calories per serving for my dishes. The calories will depend on the amount of cheese and butter used, but mine calculated out to 405 calories per sandwich.
Sunday, June 3, 2012
One Pot Rice and Beans with Veggies
Rice and beans with vegetables
4 oz canned green chilies
about 2 lbs vegetables chopped (I like just yellow squash
but use what looks good)
2 cans black beans
1 ½ cup rice long or
medium grain
2 cups water
1 tb cumin
Heat pan at medium high with 1 tb oil or butter, add rice
and cook for 1-2 minutes, add veggies and cumin and stir. Add beans and top with the 2 cups water. Cover and cook for 20 minutes on low. Because of the water in the veggies, cooking
the rice will not be an exact science with the proportions, but it my
experience, this dish is hard to ruin, so don’t worry if it seems to wet, stir
and cook it a little longer, if too dry and not cooked, add a little liquid and
cook 5-10 minutes more.
This is a go to dish at our house, because the prep work is
easy and fast with very little hands on time.
We always have rice and beans in our pantry, so it works as a way to use
up veggies, and it is a pretty cheap meal to make. And it tastes great!
This recipe makes a lot for leftovers. You can cut it in half, or just enjoy the
leftovers, they reheat well. Check back Tuesday,
and I will have a list of things you can do with these leftovers to make new
meals out of it!
Wednesday, May 30, 2012
Truffle Fries
A couple months ago, Paul and I went to a restaurant we hadn't tried before. On the appetizers list was an item that sparked my interest. Truffle fries. Being the foodie that I am, I had heard about truffles, but never had the chance to taste them or anything flavored with them.
When they got to the table, I could smell the pungent aroma of the truffles. A unique smell I had not experienced before. To describe the taste of them, the only word I have is pungent. I feel like I need the help of someone who writes labels for wine bottles to truly describe the taste. You know, on a red wine, when it has descriptions like "earthy, tobacco, cherry, leather" and such. They had a strong pungent taste. At first, I wasn't sure I liked the fries. But I eat fried food so rarely, I kept eating them enjoying the crunch. Then about halfway through, I started to really like them. By the end of the basket it became a flavor I crave!! That truffle smell and taste is something unique, nothing else like it. You just have to try it to experience it. Now I make it at home so I can satisfy that unique craving.
I bought truffle oil and use it to make these fries. I bought it from TJ Maxx from all places, but they have some interesting unique foods well discounted. I found truffle oil for about the same price as a regular olive oil, and it works great. I'm sure you could find it at just about any food store. Because I want that great crisp texture on the fries, I use store bought. I like the fries from Trader Joe's because they are natural, don't have any other seasoning on them, and really as cheap or cheaper than buying the potatoes and making them from scratch.
Truffle Fries
Frozen french fries, 2+ servings worth
1/2 -1 Tablespoon truffle oil
salt
Pepper and Parmesan cheese if desired
Cook the fries as directed by package. While still hot on cookie sheet, toss with oil and salt. Top with cheese or pepper if desired.
If you have never had truffles, or have and liked them, fries are a great canvas to taste them with.
Enjoy!
Saturday, May 19, 2012
Not your everyday popcorn!
I have a very close friend of mine who said she didn’t
really like popcorn. I was shocked! You don’t like POPCORN? After talking a little longer, I found that
the only real experience she had with popcorn was the bag of stuff that comes
out of the microwave. That’s not the
kind of popcorn I’m talking about. I’m
not saying I don’t eat it. I’ve got some
in my pantry right now. But if you want
to really experience popcorn, you have to think outside the bag!
I don’t know about you, but I grew up with my mom making
popcorn on the stove in a pot. I am
incapable of making popcorn on the stove top.
It is my cooking kryptonite. Any
time I make it, it is simultaneously burned and half un-popped. I don’t know why, but I can’t make it that
way. I have given up. I like to use an air popper. It is a really healthy way to make it, and
super easy. If you possess the ability
to make it on the stove, I am extremely jealous. Also, you can use that in these recipes too. I would still recommend the air popper if you
have it though.
In this post, I have recipes for caramel corn, popcorn with pepper
and cheese, and chocolate popcorn. They
are all just basic ratios but flexible, but you can always increase the toppings. I make my popcorn with more limited toppings,
because I try to make it more a healthy snack.
For a treat, feel free to make a bigger quantity of the toppings for the
popcorn.
Each bowl makes 2 servings, if you feel like sharing...
popcorn (about ¼ cup kernels before popped)
1 ½ tb brown sugar
1 ½ tb butter
1 tb corn syrup
kosher or sea salt
While corn is popping, microwave sugar, butter, and corn
syrup with small pinch of salt in glass microwave safe container (will get too
hot for plastic) until just bubbling, about 30 seconds depending on microwave. Drizzle over popcorn and mix, top with plenty
of salt.
When my mom made caramel corn, it was a big undertaking. She made the caramel on the stove, put the
popcorn and caramel into a paper bag and shook it until it was all mixed. This is an easy quick microwave version with
less clean up. It’s not completely covered
with caramel, but I like it that way, because then I don’t feel bad eating
more! It’s got the rich buttery caramel
taste, with the combination of salt, which I love. I think popcorn in a perfect canvas to enjoy
those tastes!
230 calories per serving when using air popped popcorn
Black Pepper and Cheese Popcorn
popcorn (about ¼ cup kernels before popped)
1 to 2 tablespoons extra virgin olive oil
about ¼ cup grated Cheese (Toscano, or your preference)
Drizzle popped popcorn with the olive oil, and toss with
cheese
This popcorn with pepper has some spice to it, but is oh, so
good. It is strangely addicting, and a
great way to enjoy the unique heat of pepper.
Cheese, of course, makes everything better. I used Toscano for this one, but any hard,
somewhat strong cheese would work. Parmesan,
Romano, Gruyere, Asiago, would all be great choices. Use your good olive oil for this, one, you
will really be able to taste it.
220 calories per serving when using 1 1/2 tb olive oil and air popped popcorn
popcorn (about ¼ cup kernels before popped)
2 tb powdered sugar
3/4 tb cocoa powder
2 tb butter
salt
Mix cocoa powder and sugar.
Drizzle popped popcorn with butter, then toss to coat with sugar mixture
and sprinkle on salt to taste.
The first time I tried to make chocolate popcorn, I drizzled
it with melted chocolate. It tasted
great, but was really messy! Everyone
who ate it ended up with chocolate covered fingers. This was my solution. It is great for satisfying chocolate cravings,
and crunchy snack cravings!
225 calories per serving when using air popped popcorn
Monday, May 14, 2012
Polenta!
I discovered polenta about a year ago. I had never eaten it before. I bought a premade hard polenta from the
store that you just had to warm up... I
really didn’t care for it. Thankfully I
didn’t give up on it either. I tried
making creamy polenta months later, and our house has never been the same!
It has become a staple food for our family. It’s fast to make, cheap, and really
tasty. It’s also very versatile –
polenta is a blank canvas you can add any flavor to. You can make anything from plain polenta, to
mushroom and herb, to chorizo. And I
like all of them!
If you are not familiar with polenta, it is a starch made of
cornmeal. It is a great side to pretty
much any meal. It is basically the
Italian version of grits, and eaten for dinner instead of breakfast. (don’t
tell the Italians that though… they think it’s special. …sorry mother-in-law)
It’s smooth, kinda creamy, and can take on a lot of different flavors. It’s also very hearty and satisfying, which I
really like about it. Here is a basic
one. I will post some of my favorite variations throughout the next month or two. ( I kinda forgot to write them down! Oops!)
Basic Creamy Polenta
4 cups vegetable or chicken stock
1 cup fine ground corn meal*
3 cloves garlic finely chopped
Salt and pepper
Bring the stock to a boil and add the garlic cloves. Add salt to the stock if it is reduced
sodium. When the stock is at a boil, whisk
in the cornmeal, adding it slowly to avoid lumps. When it starts to thicken, switch to a spoon
and stir until cooked, 5-10 min usually, depending on your cornmeal. Add salt and pepper to taste.
*I use fine ground cornmeal that I bought in the
international section. I buy it in bulk,
and it is super cheap. I really like the outcome with that product. I have
not made polenta with a medium or rough grind.
I know the cooking time would be longer, and I am assuming the
consistency would be different. Do not substitute
the pre cooked cornmeal, because it will not turn out the same.
Sunday, May 13, 2012
Boring chicken? Not anymore!
So I was at the grocery today, a wonderful cut of pork in hand. There is nothing wrong with pork, we enjoy eating it regularly. Pork tenderloin is also a lean cut of meat, a great addition to a healthy diet. I, on the other hand was not looking at tenderloin. I was looking at a cut of meat where I could see the fat throughout the meat, that fat that makes it so juicy and flavorful. I then had to make a choice, cook pork and have Paul and I eating leftovers of that for the week, or cut calories and go with chicken for the next couple days. Because I have been going with pork more often lately, I felt the need for some more lean eating. I had to go with chicken. I was, however, not willing to give up on the flavor. Which is why I made this!
Chicken with an Israeli spice rub, polenta, and green beans. I will post a polenta recipe tomorrow, but it is the spice rub I wanted to share with you today. The rub I cannot completely take credit for, I got most of it from Rachael Ray. I changed it a little to fit my tastes and the current contents of my spice cabinet, but the original idea came from her. I wanted to share it with you anyway, because it is just so good!
It's spicy! I'll say that up front. But it's not just hot, its also very flavorful. It's a little smoky, a little exotic tasting, and a lot of spicy. And it makes for chicken that is nowhere near boring. So if you are tired of cooking chicken that is getting bland, or looking for a lighter substitute like I was, this is really worth a try!
Mix a batch of this rub, and you can keep it in your spice cabinet to put on chicken at a moments notice. I think it would also go great with turkey or pork if you wanted, or even beef I suppose. You can easily double or triple the recipe, its just the proportions that matter.
Israeli Spice Rub
2 tsp paprika
1 tsp coriander
2 tsp cumin
1 tsp garlic powder
1 tsp crushed red pepper flakes
This is great for chicken on the grill, or cooked in a skillet. I prefer chicken thighs for cooking like this, because they stay moist. I use chicken breasts more for braising.
About 170 calories per chicken thigh when cooked in skillet with 1/2 tablespoon olive oil per thigh
Chicken with an Israeli spice rub, polenta, and green beans. I will post a polenta recipe tomorrow, but it is the spice rub I wanted to share with you today. The rub I cannot completely take credit for, I got most of it from Rachael Ray. I changed it a little to fit my tastes and the current contents of my spice cabinet, but the original idea came from her. I wanted to share it with you anyway, because it is just so good!
It's spicy! I'll say that up front. But it's not just hot, its also very flavorful. It's a little smoky, a little exotic tasting, and a lot of spicy. And it makes for chicken that is nowhere near boring. So if you are tired of cooking chicken that is getting bland, or looking for a lighter substitute like I was, this is really worth a try!
Mix a batch of this rub, and you can keep it in your spice cabinet to put on chicken at a moments notice. I think it would also go great with turkey or pork if you wanted, or even beef I suppose. You can easily double or triple the recipe, its just the proportions that matter.
Israeli Spice Rub
2 tsp paprika
1 tsp coriander
2 tsp cumin
1 tsp garlic powder
1 tsp crushed red pepper flakes
This is great for chicken on the grill, or cooked in a skillet. I prefer chicken thighs for cooking like this, because they stay moist. I use chicken breasts more for braising.
About 170 calories per chicken thigh when cooked in skillet with 1/2 tablespoon olive oil per thigh
Sunday, May 6, 2012
Craving noodles?
So, for a couple weeks in a row, I was craving noodles. I just wanted to sit down and enjoy a big
bowl of hearty, chewy, carby, goodness.
I set out to make some Thai peanut noodles to satisfy my craving. In the middle of cooking I changed directions
into a happy accident! I had seasoned my
ground beef with soy sauce and garlic.
It tasted so good, I had to make a whole dish of those flavors!
The salty savory richness of the soy sauce,
with the spicy bite of garlic combined with the heartiness of beef and noodles
is a dish that I now want over and over again!
What I ended up with is super quick, easy, and just a couple of
ingredients, but oh so good! It even has
veggies, so you can feel good about eating it! This is nothing spectacularly fancy, but it may be the recipe
I am most proud of, because it is my favorite thing to eat that I make!!
This makes a lot, but can easily
be cut down by half. It keeps well in
the fridge, and can be reheated easily, or eaten cold as a salad. Or for variety, heat it up and but it in lettuce leaves for lettuce cups! This is also a recipe that can easily be made
gluten free by using your favorite gluten free spaghetti (I recommend not using Asian rice noodles, those are
great in a lot of applications, but not for this dish) and gluten free soy
sauce.
Asian Soy Sauce and Garlic Noodles
2 lbs ground beef
4 garlic cloves lightly smashed, not chopped
12 oz bag broccoli slaw
½ lb pasta (spaghetti or linguine)
5 Tb rice wine or mirin*
4 Tb soy sauce
¼ tsp red chili flakes
¼ tsp sesame oil*
Brown the ground beef. When beef is starting to let out some fat,
add smashed whole garlic cloves. Wait
until there is some fat in the pan so you do not burn the garlic.
After draining the fat from the pan, add 2 Tb each of soy sauce and rice wine and the ¼ tsp chili flakes and stir.
While beef is cooking, cook the pasta to package directions.
When pasta is almost finished add veggies to beef and cook for only 1 or 2 minutes. You want them slightly softened but not limp.
Drain pasta and add to beef mixture along with remaining rice wine, soy sauce and sesame oil. Combine and top with an extra drizzle of sesame oil and sesame seeds if desired.
After draining the fat from the pan, add 2 Tb each of soy sauce and rice wine and the ¼ tsp chili flakes and stir.
While beef is cooking, cook the pasta to package directions.
When pasta is almost finished add veggies to beef and cook for only 1 or 2 minutes. You want them slightly softened but not limp.
Drain pasta and add to beef mixture along with remaining rice wine, soy sauce and sesame oil. Combine and top with an extra drizzle of sesame oil and sesame seeds if desired.
*Rice wine can be found at regular grocery stores in the
Asian section. Mirin is a sweetened
version. They are good to keep on hand
for any Asian cooking, but do not substitute it for rice vinegar, it won’t have
the same taste. Sesame oil can also be
found in the Asian section. It adds that
little extra something that you taste in most any Chinese food. I little goes a long way! It is really good, and if you don’t have it,
I think it is worth getting and adding to just about any Asian dish. Keep in it the fridge so it lasts longer.
Tuesday, May 1, 2012
Dress Up Breakfast
This last weekend I made waffles with blueberry syrup. I
used gluten free Bisquick, and just followed their recipe. The
waffles turned out perfect, a little crunchy on the outside and light and
fluffy on the inside! I was surprised with
the success of gluten free waffles. They
were so good, I got scared I mixed up the flours and make it with gluten
instead! I know you can make gluten free
waffles from scratch, but when it comes to some gluten free baking I found that
sometimes mixes just work better.
The blueberry syrup turned out great too. And really simple. I did it because I wanted something a little
less sugar dense to top the waffles, since both Paul and I are trying to eat
healthy. Just picture warm sweet blueberries
with a little added thickness of maple syrup mixed with the juices coming out
of the blueberries. Perfect for
drizzling. That makes a pretty great
start to the morning for me! It would
work with waffles, pancakes, or even ice cream.
Here it is!
1 cup blueberries
3 tb maple syrup (use
the real stuff! It’s so much better!)
Put blueberries and syrup in small saucepan, and let cook on
a bare simmer for 10 minutes. You can
let it stay on the stove for longer if needed.
If it seems too runny, you can keep it at a simmer for a little longer.
You can save the leftovers. I mixed mine with some plain vanilla yogurt. Amazing! It made the yogurt go from plain breakfast to a dessert like treat that reminded me a bit of a parfait.
Sunday, April 29, 2012
Latte? Yes, Please!
There is barely a day that goes by that I don't have a cup of coffee, or two, or....well, I just like coffee. Most of the time my coffee just comes from my little Mr. Coffee machine, and it's great, but when I want something a little more special, and don't feel like spending 4 bucks on it at a coffee shop I have a solution!
I just got a new toy. It's a stick blender. It's great! It makes sauces, soups, and things like applesauce SO much easier to do! What I don't have is a milk frother, but I'm not willing to spend the money on one ($100 for steamed milk, no thanks!). So, I heated up some milk, stuck in the stick blender, hoped for the best, and this is what happened! Well, with a few steps in between, but it was super easy!
Here is how to make a great latte at home. The steps for the espresso I learned watching Alton Brown, so I cannot take credit for that part. The pinch of salt is needed, even though that sounds weird. It helps keep the coffee from being bitter. If your coffee is still bitter, make sure you haven't ground your coffee too fine, it should be a normal grind, and make sure you didn't steep too long. If you don't have a french press and want
one, I know there are a lot of expensive ones out there, but I got mine
for under $20 and it works just fine. With different proportions, I often prefer it for brewing coffee instead of using my coffee maker.
Grind up 2 heaping coffee scoops of coffee beans, or a generous 1/4 cup. Or use pre-ground.
Add to a french press with a pinch of salt and pour over 10oz of boiling water and steep for exactly 3 minutes.
While coffee is steeping, heat about 2 cups of milk and microwave until hot. Add 1-2 tablespoons of sugar, depending on how sweet you like your coffee.
Put in stick blender, turn on, and make sure it is not completely submerged, so it can work some air into the milk and sugar. It may take a couple times to get the feel of it. (Don't fill the milk to the top and then put the blender in... unless you really like cleaning your counters, and wearing milk as an accessory.) I use a large Pyrex measuring glass, but anything that holds at least 3-4 cups will do.
Pour in desired proportions of milk and coffee (I suggest 1/4 coffee, 3/4 milk), stir, then scoop the foam from the top of the milk into your mug!
makes 2 lattes
The morning I made it, my husband and I were really excited and liked them. So much so that he asked for one later that afternoon. I made it for him, and then he asked for a third!!
For a couple variations, consider adding a small amount of vanilla extract to your milk, or mixing in a little chocolate syrup or sprinkle with cinnamon.
135 calories per latte (may not be an everyday indulgence, but certainly lighter than Starbucks!)
I just got a new toy. It's a stick blender. It's great! It makes sauces, soups, and things like applesauce SO much easier to do! What I don't have is a milk frother, but I'm not willing to spend the money on one ($100 for steamed milk, no thanks!). So, I heated up some milk, stuck in the stick blender, hoped for the best, and this is what happened! Well, with a few steps in between, but it was super easy!
Add to a french press with a pinch of salt and pour over 10oz of boiling water and steep for exactly 3 minutes.
While coffee is steeping, heat about 2 cups of milk and microwave until hot. Add 1-2 tablespoons of sugar, depending on how sweet you like your coffee.
Put in stick blender, turn on, and make sure it is not completely submerged, so it can work some air into the milk and sugar. It may take a couple times to get the feel of it. (Don't fill the milk to the top and then put the blender in... unless you really like cleaning your counters, and wearing milk as an accessory.) I use a large Pyrex measuring glass, but anything that holds at least 3-4 cups will do.
Pour in desired proportions of milk and coffee (I suggest 1/4 coffee, 3/4 milk), stir, then scoop the foam from the top of the milk into your mug!
makes 2 lattes
The morning I made it, my husband and I were really excited and liked them. So much so that he asked for one later that afternoon. I made it for him, and then he asked for a third!!
For a couple variations, consider adding a small amount of vanilla extract to your milk, or mixing in a little chocolate syrup or sprinkle with cinnamon.
135 calories per latte (may not be an everyday indulgence, but certainly lighter than Starbucks!)
Saturday, April 28, 2012
Kale Chips...you've got to try these!
Ok, I know they sound weird, but they are super easy and
super good! I will warn you, they are
really addicting, so don’t be surprised if you start craving them. But hey, it’s kale, so it’s a good
craving! :-) When my mother-in-law first told me about
them, I was really skeptical, it took me like 6 months to try them, but now I
am so glad I did! I watch a little 11 month old baby in the mornings. I told her mom
about these, she loves them, she fed them to her daughter and told me that they are the only
vegetable that her daughter will eat without a fight! I thought that
that was pretty funny!
Use a good olive oil,
because you can really taste it on these.
I like to buy a bunch of kale, wash it, and keep it prepared in my
fridge. It keeps for at least 4 days
depending on how fresh it is from the grocery.
Then I just take some out, toss with oil, and bake to have with lunch or
dinner!
Heat your oven to 400°.
Wash a bunch of kale leaves, and tear or cut out the middle stem. Tear leaves into pieces, and dry
thoroughly. I use a salad spinner.
For about every 8 cups of kale I toss with a
generous tablespoon of olive oil.
Spread
on a cookie sheet and salt.
Cook for
about 15-20 minutes. Tossing occasionally
so they cook evenly.
They should be dry
and crackly, but not burnt. If you take
them out while they are still a little soft, they will be kind of chewy, and
not very good.
I’d say 6-8 cups of leaves not packed will be a serving for
2 or 3. They shrink down a lot as you
can see! I will admit to eating that much all by myself though….. :-) Enjoy!!
If you try these leave a comment and tell me what you think!
Thursday, April 26, 2012
Risotto!
A couple things about my risotto. 1. I used a very dry, not sweet white wine. I don’t care for the taste of it otherwise. 2. I think Parmesan is traditional, but I used Gruyere instead – mostly because it is what I had in my fridge at the time, but I really liked the taste of it. You could absolutely substitute Parmesan if you wanted. 3. I know there is no salt in my recipe, except with the mushrooms. I did that because the stock and the cheese added all the needed salt. You may find you need to add some yourself though.
Risotto with Mushrooms and Sausage
Ingredients
2 cups Arborio rice
4 cups chicken or vegetable stock
2 cups dry white wine
1-2 Tb butter
1 lb spicy Italian sausage (I used lean turkey sausage)
16 oz mushrooms sliced
4 cups fresh baby spinach leaves
¾ cup gruyere cheese grated (any favorite hard cheese would work, Parmesan,Tuscano, Romano etc)
salt to taste
optional: red pepper flakes, black pepper
Heat stock and wine together in a saucepan and bring to a bare simmer. Melt 1/2 Tb butter in another saucepan over medium heat. Add rice to butter and toast* for 2 minutes. Add a couple ladle-fulls of broth mixture into rice until it covers the rice, and stir occasionally. Keep the rice at a bare simmer. Every 5 minutes or so when the liquid no longer covers the rice, add a couple more ladle-fulls of broth mixture and keep stirring occasionally. After about 20 minutes start testing the rice. It will be done when it is tender all the way through, about 30 minutes.
While the rice is cooking, cook the sausages through. I like to take them out of casings, and crumble meat, but you can leave the whole and slice after cooking if desired. I like lean italian sausauge, but I cannot always find it in the spicy variety, so I add red pepper flakes and black pepper to taste (1/4-3/4 tsp depending on taste and desired heat). Remove sausage from pan and leave about 1 Tb of liquid from sausages. If they did not give off any fat, add 1 tablespoons of butter to the pan. Add mushrooms and a pinch or salt to pan on med-high heat, they should sear and cook through. Slice the sausage and add back to mushrooms when they are cooked.
When rice is cooked stir in cheese to combine. Stir in 1 additional Tb butter if desired for silkiness. Add mushrooms and sausage to pan with rice. Stir until the rice soaks up the liquid from the mushrooms and sausage. Fold in spinach until just wilted and serve with grated gruyere on top.
*To toast
rice, just cook over medium heat with butter stirring frequently. It will become translucent; just make sure
that it does not start to burn.
Makes 4 generous 2 cup servings. 748 calories per serving
Sunday, July 31, 2011
Pizza Breakfast!!!
I love cooking for people. Having people enjoy my food is like Christmas morning.....and I REALLY like Christmas. So last weekend I cooked brunch for my husband and some of our friends. I made french toast and a frittata. The french toast was ok, I like to cover it in panko breadcrumbs to make it extra special, but it needs some more work before posting a recipe. However, I am excited to share my frittata with you, it turned out great, and everybody liked it! Here it is.
Ingredients
8 oz mushrooms sliced
2 Tablespoons butter
Pepperoni
8 eggs
1 cup mozzarella cheese
1/4 cup Parmesan cheese
salt to taste
Using a medium saute pan, melt butter, then cook the mushrooms on med-low heat with a generous pinch of salt until they are soft. Meanwhile, beat the eggs with a fork. Beat well, but don't try to work air into them. When the mushrooms are done, spread them out evenly in the pan, then put the pepperoni on top in rings like you would put on a pizza. Add the cheese to the eggs, then pour the mixture in carefully trying not to disturb the mushrooms and pepperoni. Let it cook on the stove, until you can see the bottom and sides are cooked. Then put it into the oven until the top is no longer runny.
This is super easy, and as long as you choose the pepperoni and cheeses carefully, it's gluten free :-) It was a fun way to have the flavors of pizza for breakfast. Better than last night's cold/stale pizza in my opinion! Oh, and I know some of my instructions were vague (how much pepperoni, oven cooking time) sorry, I'm trying to get better at writing stuff down, but I still forget. If you try this, let me know, I would love to hear how you like it!
Alison
Pizza Frittata (serves 4+)
Ingredients
8 oz mushrooms sliced
2 Tablespoons butter
Pepperoni
8 eggs
1 cup mozzarella cheese
1/4 cup Parmesan cheese
salt to taste
Using a medium saute pan, melt butter, then cook the mushrooms on med-low heat with a generous pinch of salt until they are soft. Meanwhile, beat the eggs with a fork. Beat well, but don't try to work air into them. When the mushrooms are done, spread them out evenly in the pan, then put the pepperoni on top in rings like you would put on a pizza. Add the cheese to the eggs, then pour the mixture in carefully trying not to disturb the mushrooms and pepperoni. Let it cook on the stove, until you can see the bottom and sides are cooked. Then put it into the oven until the top is no longer runny.
This is super easy, and as long as you choose the pepperoni and cheeses carefully, it's gluten free :-) It was a fun way to have the flavors of pizza for breakfast. Better than last night's cold/stale pizza in my opinion! Oh, and I know some of my instructions were vague (how much pepperoni, oven cooking time) sorry, I'm trying to get better at writing stuff down, but I still forget. If you try this, let me know, I would love to hear how you like it!
Alison
Subscribe to:
Posts (Atom)
.jpg)